


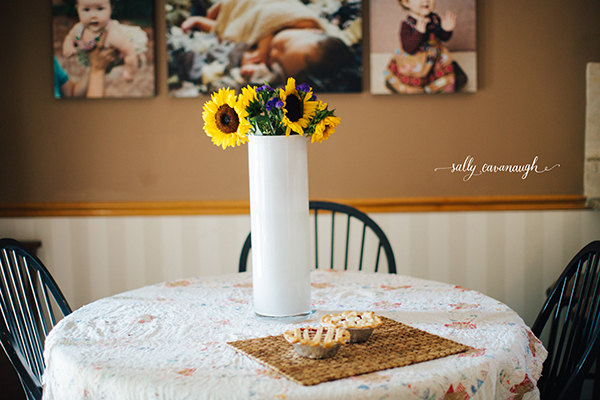
Our daughter’s third birthday is coming up. In years past we have celebrated with a big event – my friends, my husband’s friends, family, cousins and kids galore! This year we decided to do things a little differently. We are planning a small, quaint little party and we are letting her decide the details.
Well, you should have seen the look on my face when I asked her what kind of party she wanted to have and the words “pie party” shot out of her mouth. What? You mean a Cinderella party or Sofia the First party, right!? I have no idea how she came up with the idea. I don’t cook, and I don’t bake. Again, you should have seen the look on my face. But, I went with it, “Oh, great idea!” We are just going to have to learn together, pie party here we come!
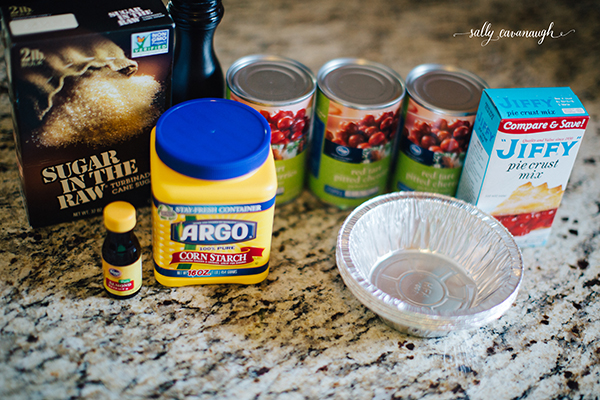
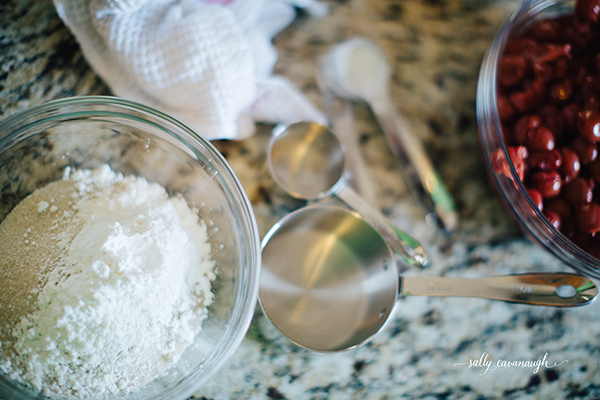
I decided, first things first, I need to figure out how to make a pie. So, I looked up a couple recipes, compiled a few together, and got busy in the kitchen. As a beginner, I decided to just learn for myself. I can honestly say I can’t remember the last time I baked. Eek! So this time was adult hands only and next time the toddler hands can help. Going to the store, I had to buy EVERY ingredient on the list, including cornstarch and sugar. (For a second, I thought the Sugar In the Raw we have for our coffee might work, but then I got nervous, so I went and got some sugar from the baking aisle. I wasn’t sure… are all sugars created equally?)

Here is the recipe I used:
Cherry Pie
Ingredients
- 1 box Jiffy Pie Mix
- 3 cans tart cherries in water
- 4 tablespoons cornstarch
- 1 1/4 cups sugar
- 1/8 teaspoon salt
- 1/4 teaspoon almond extract
- butter
Directions
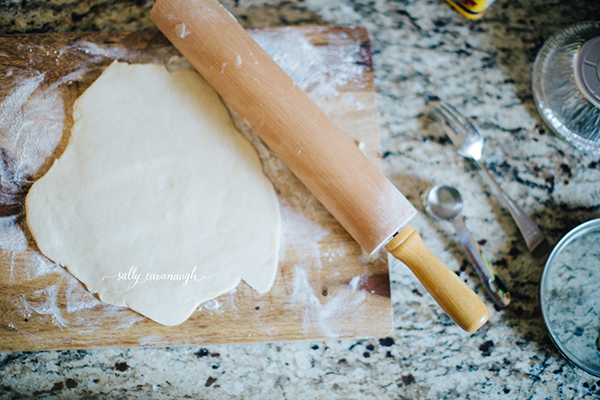
1. Make the pie crust. Add 5 tablespoons of water to the box of Jiffy Pie Mix and stir it with a fork until it’s all mixed together.
2. Sprinkle flour on the counter or cutting board and use a rolling pin to roll the dough flat.
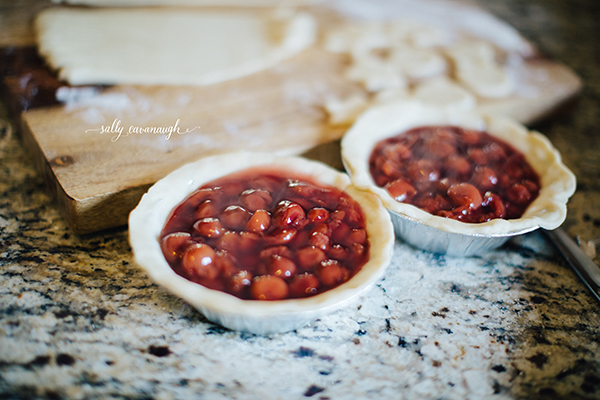
3. Arrange the bottom crust in the pie pan. Because I was making mini pies, I used a circle object to cut the dough. The lid to our sugar canister, seemed to match the dimensions of my small pie pan, so I used it as a cookie cutter. Look around your kitchen for items that match the size of your pan if you want to cut a circle pattern out of the dough.
4. Make the pie filling in a saucepan – Mix the cornstarch, sugar and salt together. Add 3 cans of tart cherries, while only using the juice from one can. Add the almond extract. Place the sauce pan over medium-low heat and bring to a simmer. Stir regularly for about 10 minutes until the sauce begins to thicken and bubble. Set it aside to cool.
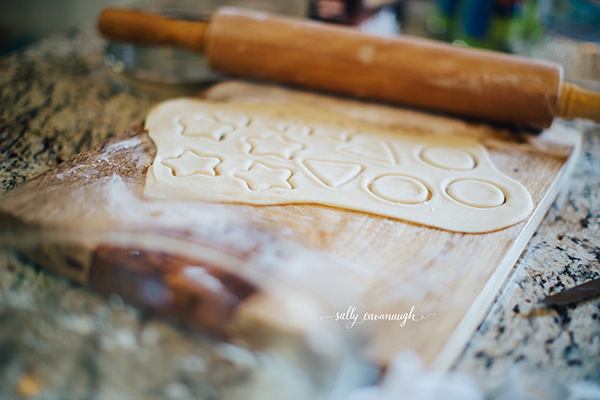
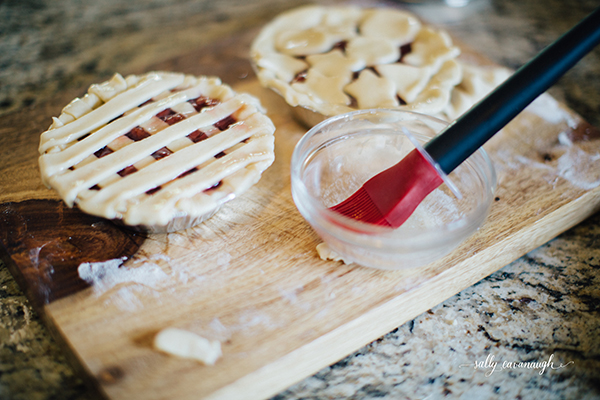
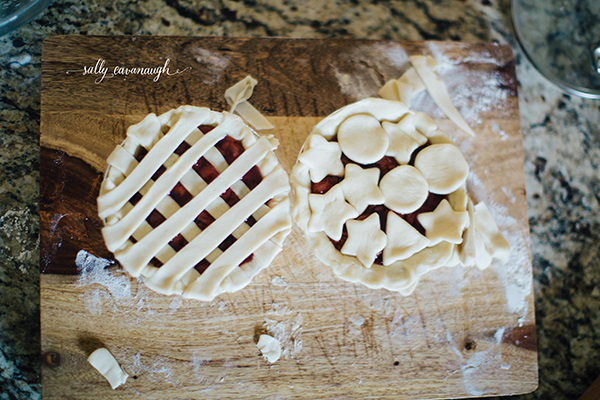
5. Roll out the dough for the top crust. Cut strips with a knife or use cookie cutters to make fun shapes.
6. Once the pie filling has cooled, pour it into the pie pan with the bottom crust and lay the top crust strips or cut outs over the filling.
7. Brush melted butter over the top of the crust.
8. Cook at 425 degrees for 15-18 minutes.
9. Let the pie set for a few hours before eating.
Baking to me is like knowing your cardinal directions. You either get it or you don’t. For me, it’s not ingrained. I can follow a simple recipe, but a pinch of this and a touch of that doesn’t work for me. For all you non-bakers out there, this was easy. I learned a few things along the way and although they may sound silly, the non-bakers can relate. I just don’t have experience, so the simple things that come so naturally to some of you are the first things us non-bakers need to learn. Coming away from this experience I want to share my top three tips for the non-baker.

1. Buy pre-made dough. I didn’t even think about trying to make my own dough and all you have to do for the pre-made dough is add water.
2. When handling the dough (rolling, cutting, etc.) you will want to put some flour on the cutting board and on the rolling pin. (This was a trial and error situation for me, I tried PAM first, and it didn’t work, then I thought about pictures I’d seen in the recipes and they had flour under the dough, BINGO!)
3. Mix your dry ingredients together first, before adding the wet ingredients.
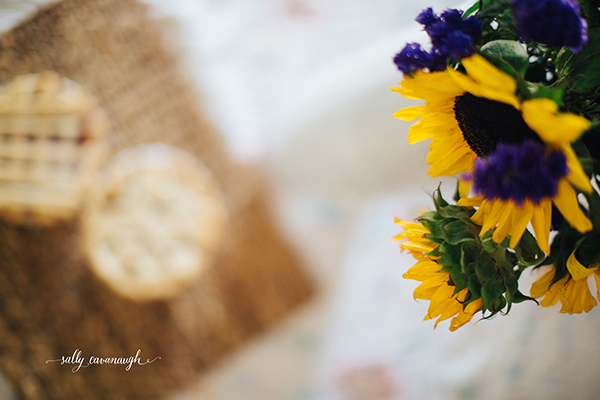
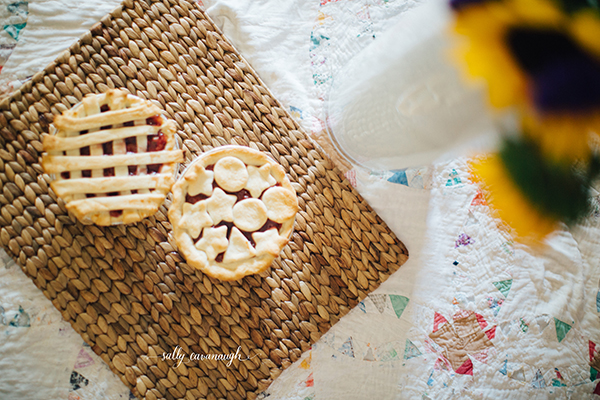
The best part about this all, the pie was delicious! Now it’s time to try with one set of toddler hands before all her little friends come over and I have 16 toddler hands baking.


